
Tours Best Practices: Tour Creation
In this article we cover best practices for tour creation. Please see our Best Practices for Tour Planning article first, before continuing with Best Practices for Tour Creation.
Quick Review!
Do you remember all you learned about Best Practices for Tour Planning? If you're not sure, test your knowledge here.
Now that we're all on the same page with planning our tours, let's get into the Best Practices of Tour Creation.
Product Fruits' Best Practices for Tour Creation
When To Use Tours Instead of Hints
We often see cases of clients using long tours with many steps in situations better suited for hints. But how do you know where to use what? Check out our video to see a comparison of when to use tours versus hints:
To recap what we covered:
 Tours are best used for:
- Welcoming new users
- High-level overviews
- Introducing new features
- Highlighting parts of a process or teaching users how to do something new
 Hints are best used for:
- Short, on-page contextual help
- Linking to or opening articles
- Directing users to useful information they can learn on their own time
- Highlighting new sections of your application that don't require much explanation
Make Your Tour Short and Simple
We understand that making tours short and simple might sound counterintuitive when you have a lot of information to share. You might have a complicated application and/or a lot of churn due to a lack of understanding from trialists.
However, as we mentioned, the goal should be to make users feel empowered, not overwhelmed. Especially in the beginning, users are excited and want to start doing things.
 Warning: A welcome tour should not take 15 minutes to complete because by that time you've already lost them.
Need some inspiration for a short, engaging tours? Check out our use cases.
 Tip: That is why we recommend making tours not only short, but as interactive and as engaging as possible.
Make Your Tour as Interactive and Engaging as Possible
This best practice is made for those tours where it really is necessary to show or explain many aspects of your application.
How can you make a tour interactive when you need to share a lot of information?
- Break up and vary the content as much as possible e.g. videos, gifs
- Let users fill in forms and complete actions whenever possible
- Let them actually engage with your product. Because, after all, isn't that the whole point? They came to your platform because they want to use it. So let them!
Not sure how to achieve this? Check out one of our working examples:
 Try it out!
- Create a
tour card and select your "Submit" button or similar.
- Change the settings in the editor:
- Change the Advance Action to
- Remove
- Detach the tour card and adjust the positioning
- Test to make sure its working properly!


Don't be afraid to get creative with your onboarding! Business doesn't always have to be boring, but it should be polished! To make sure your tours look and behave their best when your end users see them, you'll want to make sure you test them extensively.
Test, Test, Test!
It is absolutely vital that you test your tours before publishing them live to all your users. Previewing Tours is an excellent tool, yet often any conflicts or issues will arrive once a tour is published live. We have many tips on debugging and troubleshooting on our main knowledge base, yet our main tips here are:
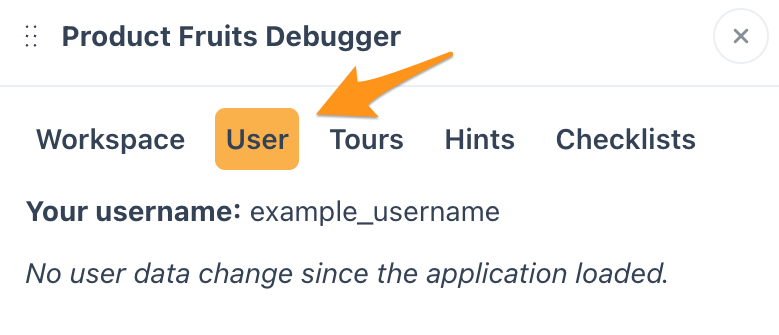
- Use the debugger User tab to find your username when you want to publish live content for only you to see:

- Always test tours LIVE, with multiple users on multiple devices and browsers to determine possible breaking points e.g. if you are testing a tour on Chrome, have your colleagues test on Safari, Firefox, and Edge.
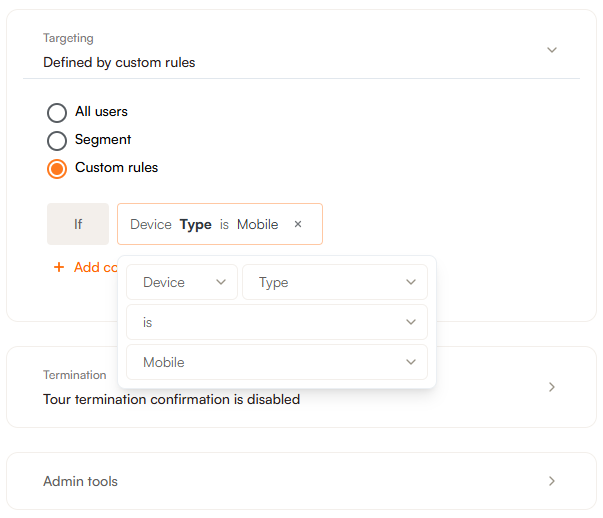
- Test your tours on Desktop and Mobile to determine if you need to make separate tours by device type.
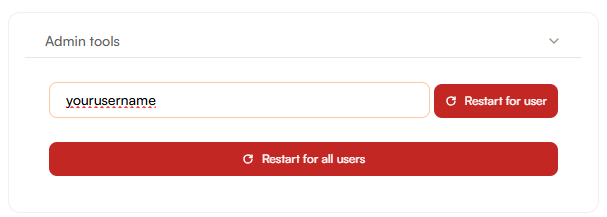
- If you are testing tours set to once per user, you must ALWAYS reset the tour using the Admin Tools on the tour itself in order for it to show again
- Pay attention to any elements in your application that you are targeting which may change:
We see this most commonly with:
- Targeting navigation bars and menus - can often change based on what different types of features or parts of your application users have access to.
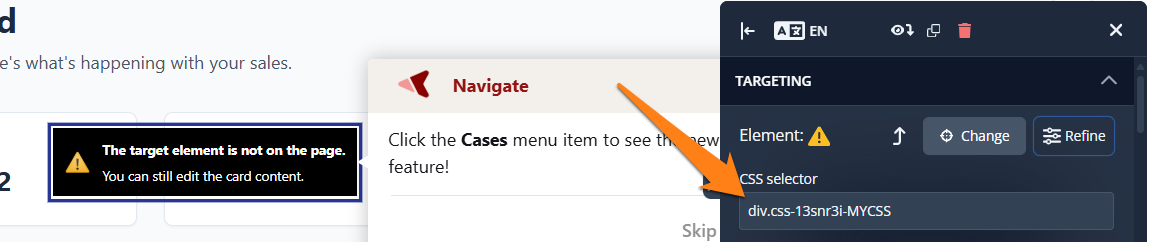
- Any element with a dynamic css selector - these types of selectors change often causing tours to either break or point at the wrong element. We recommend adding unique ID's or using text targeting for these elements.
- Or any element that uses an :nthchild selector- if more elements appear before this element the tour will end up targeting the wrong element:
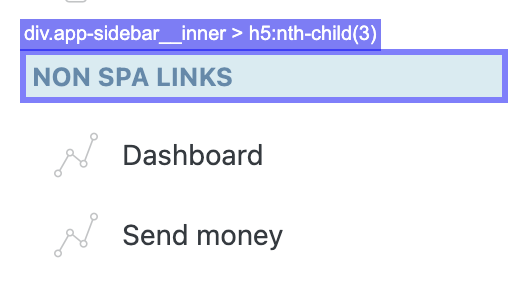
- These types of elements can sometimes change (remember why we said it's a good idea to build a relationship with your developers?), and changes to elements in your tours can cause your tours to break without you realizing.
Now that you've thoroughly tested all your tours, you can get back to the important part: providing your users with contextual and timely help so that they can make the most of your application.
Use Custom Buttons for Enhanced Scenarios
Whether branching tours, customizing your tour card styling, or taking users across multiple pages, custom buttons have many amazing uses. Find them under the green plus button
This brings us to our last Best Practice for Tours: utlizing the life ring button.
Use the Life Ring Button to Allow Users to Replay Tours
While it might not be necessary for Welcome Tours, users may want to retake other tours they've seen in the past. The Life Ring Button is the perfect home for all your helpful resources. You are probably already using it for linking useful information for your users, so why not add important tours as well?
- First, create a tour or identify a tour or tours you've already created that your users might benefit from having on hand.
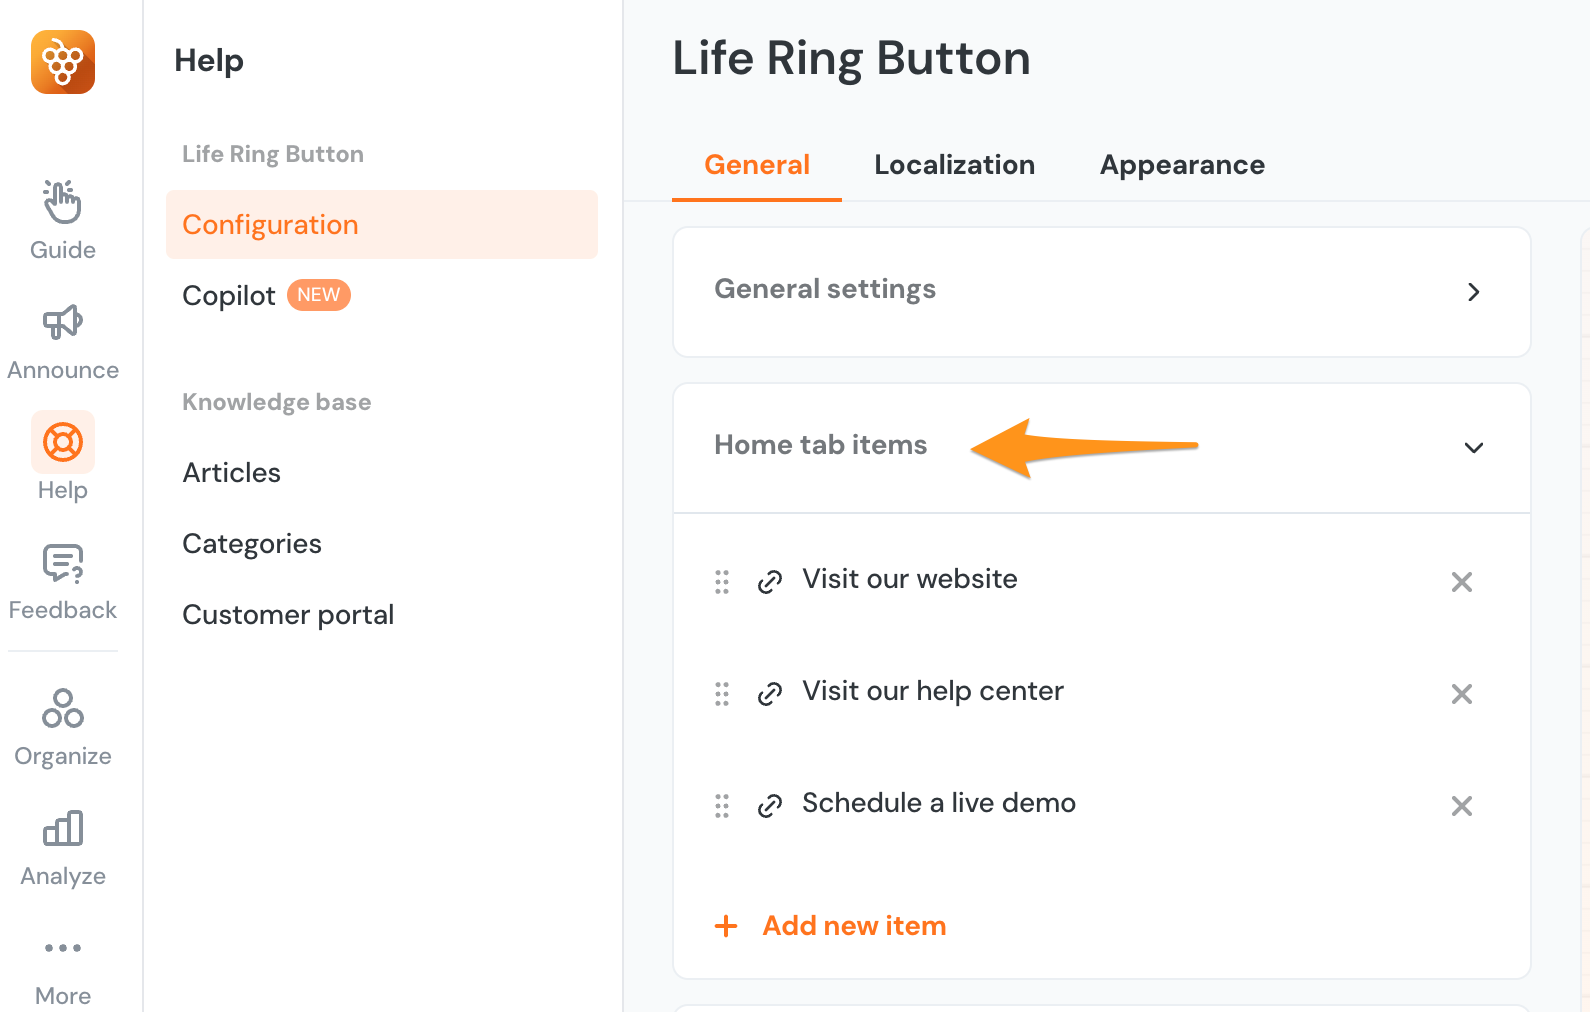
- Next, navigate to the Life Ring Configuration page. Click on the Home Tab Items dropdown.
-
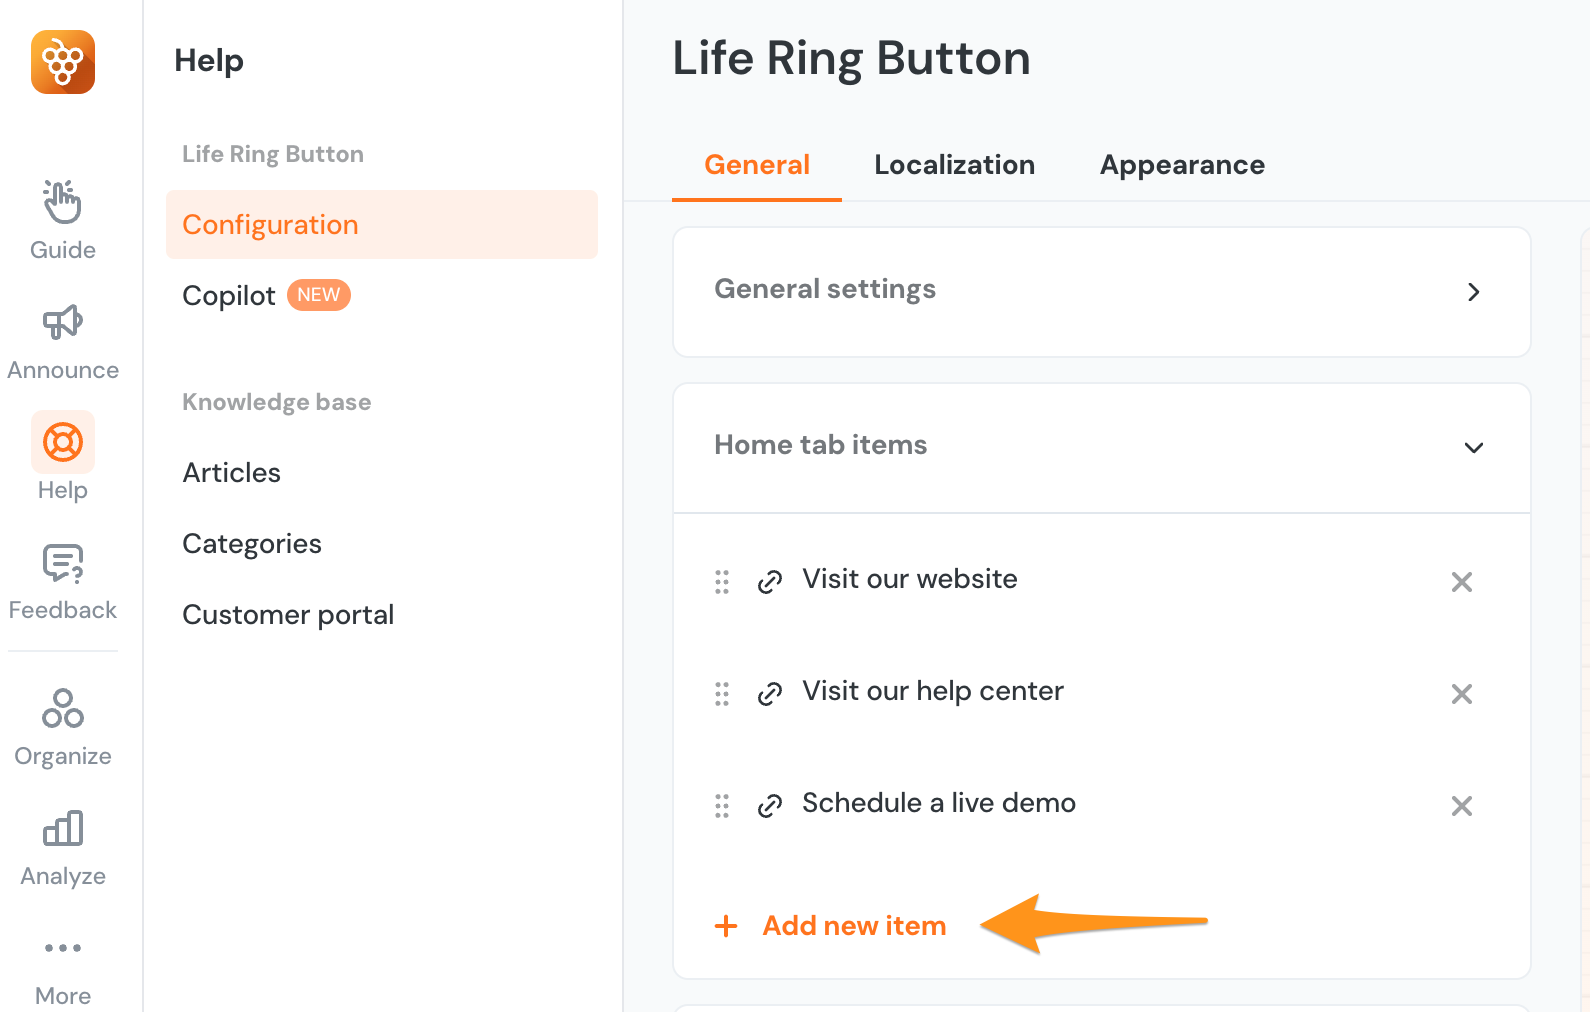
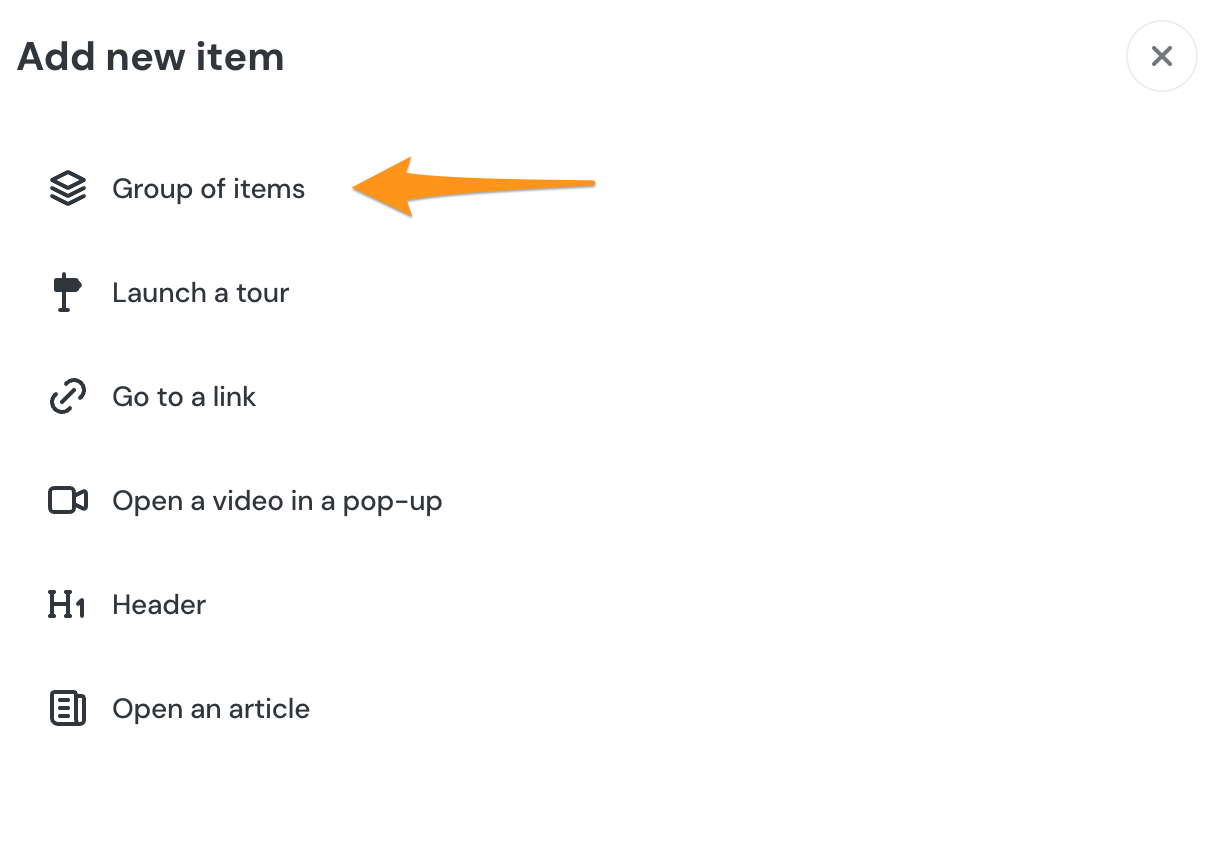
You can tours individually, but you will most likely want to have a group of tours for your users to access. To create a group of tours, click Add New Item, then Group of Items.:
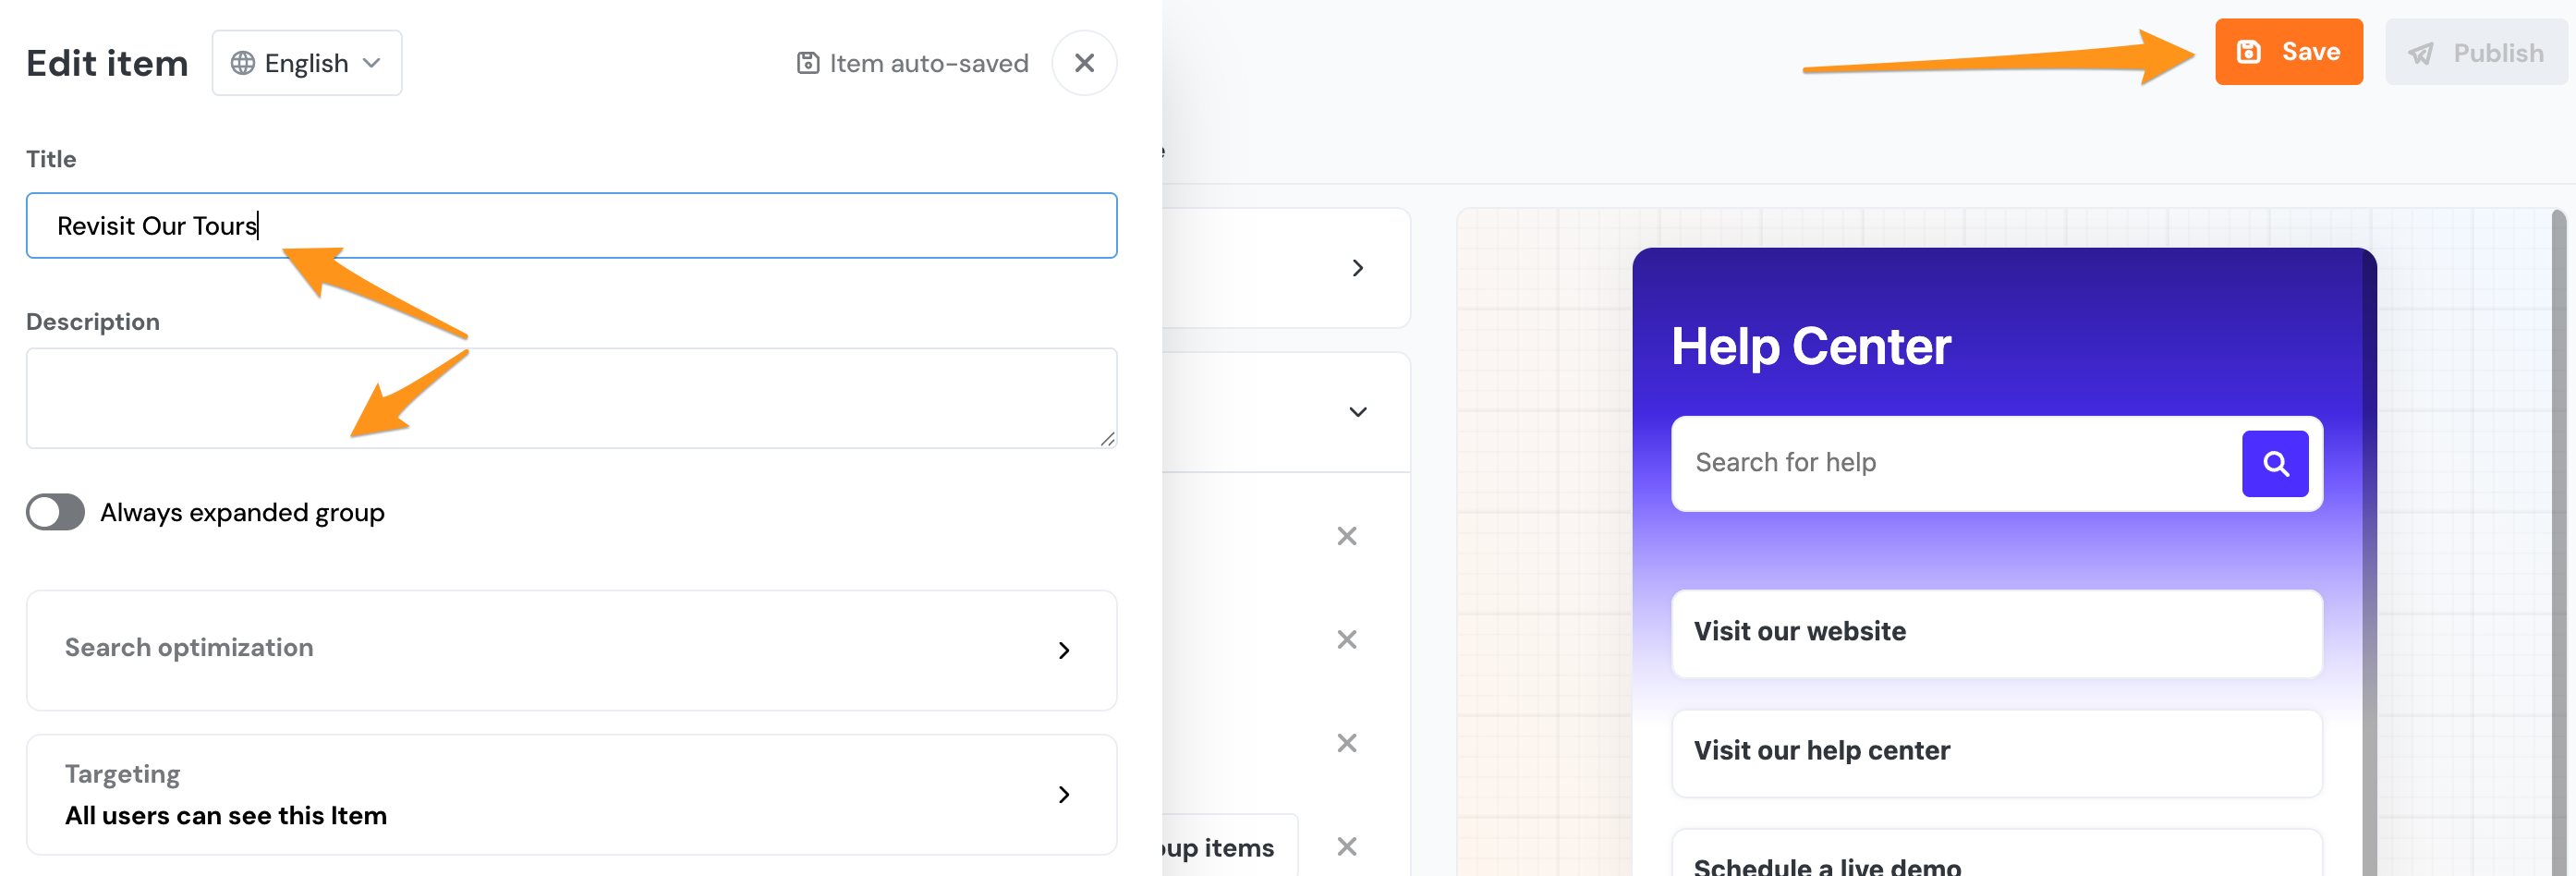
- Now give your Group of Tours a name (and description if you choose) that will make it clear to users what they can find in this section of the Life Ring. Make sure you click Save!!
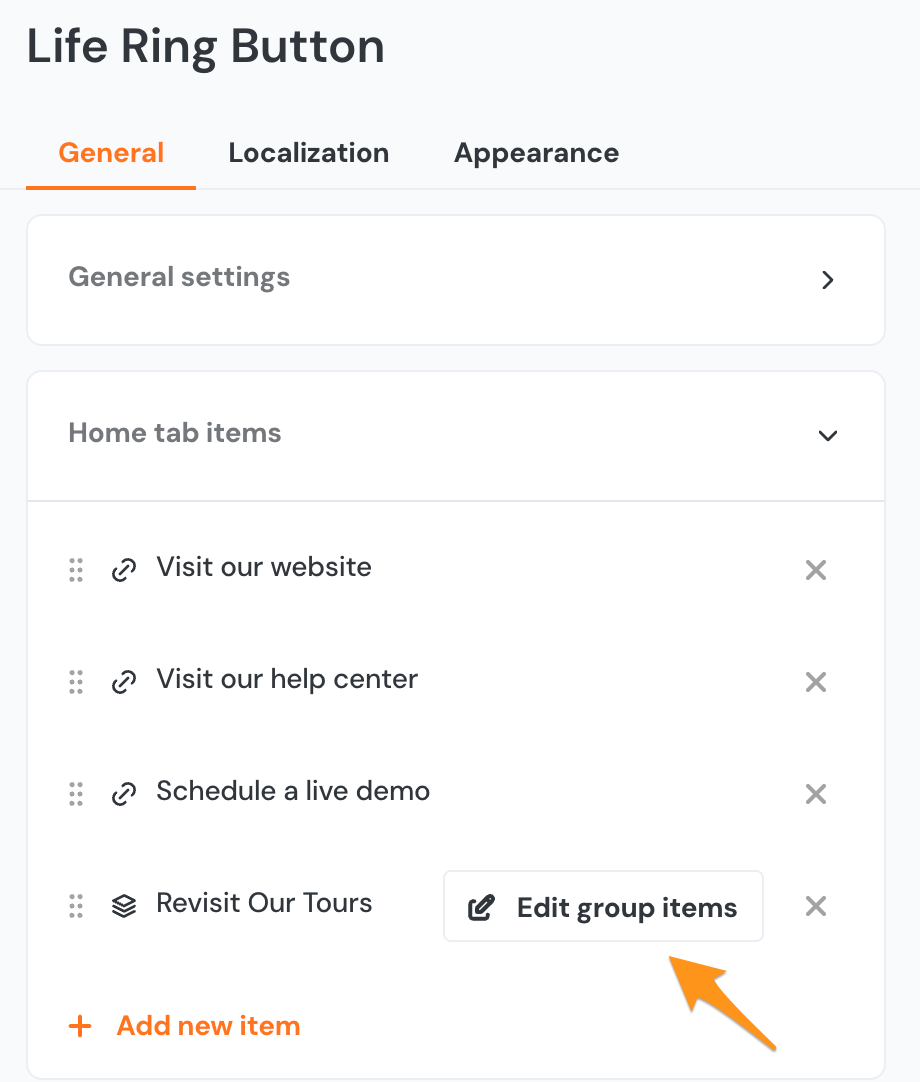
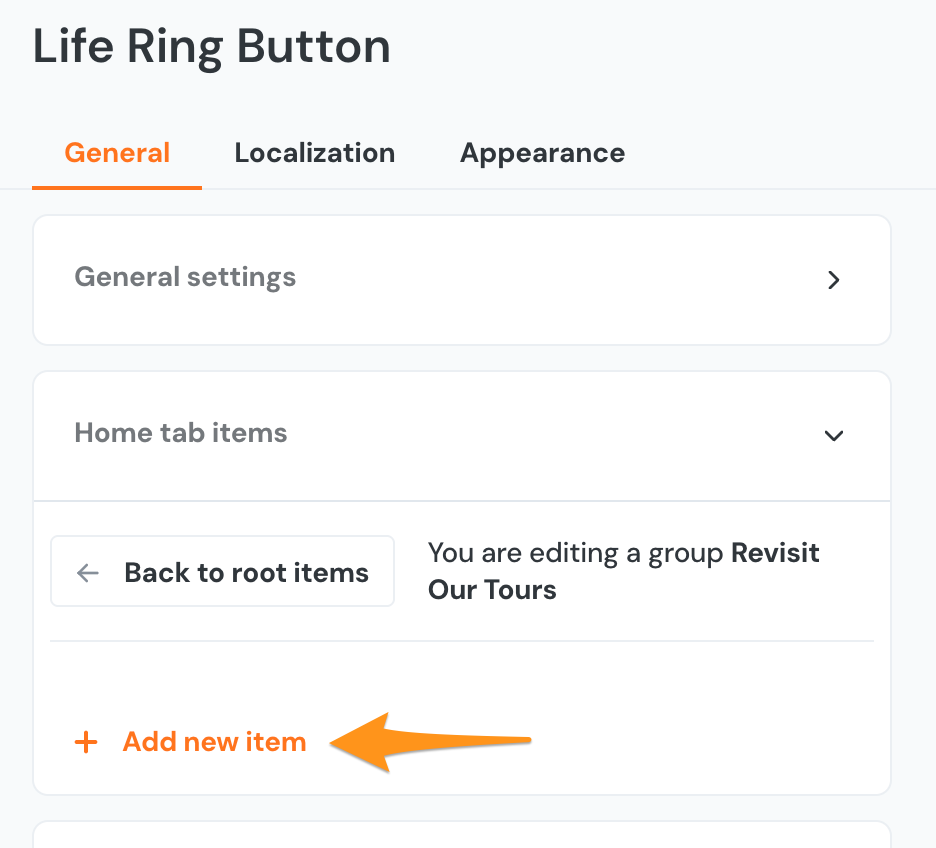
- You can now click the x on the top right of the Group Description screen to return to the Life Ring Configuration page. From here, click Edit Group Items to add tours to your newly created Group.
-
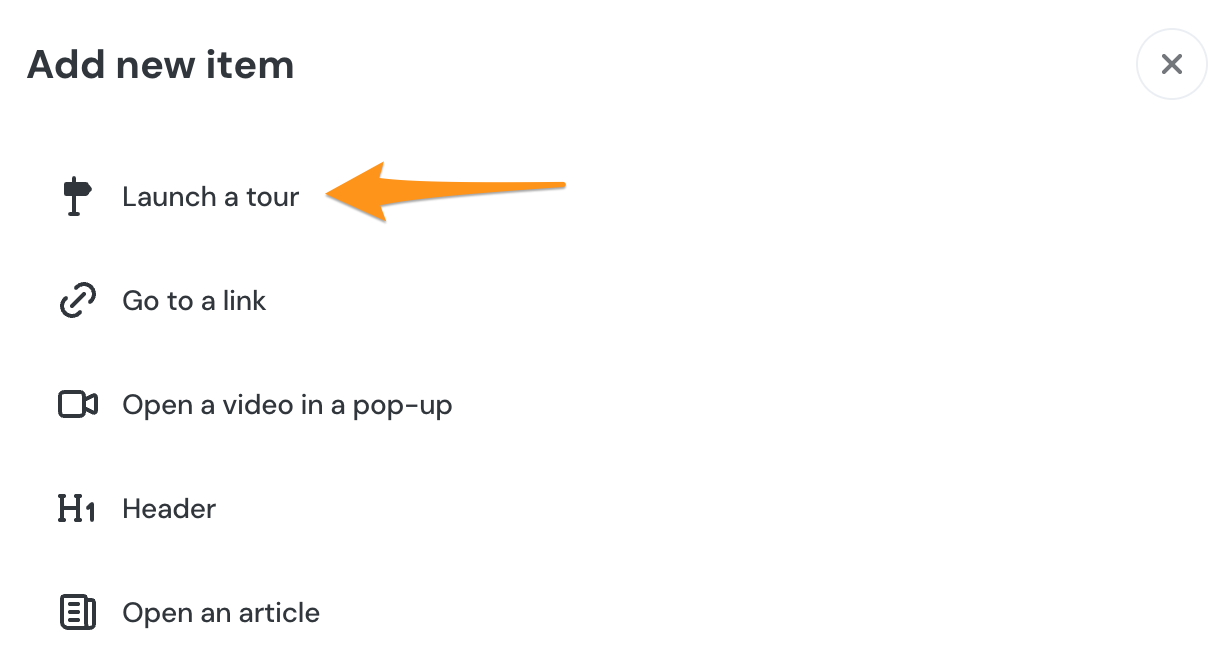
From here, you will choose launch a tour.
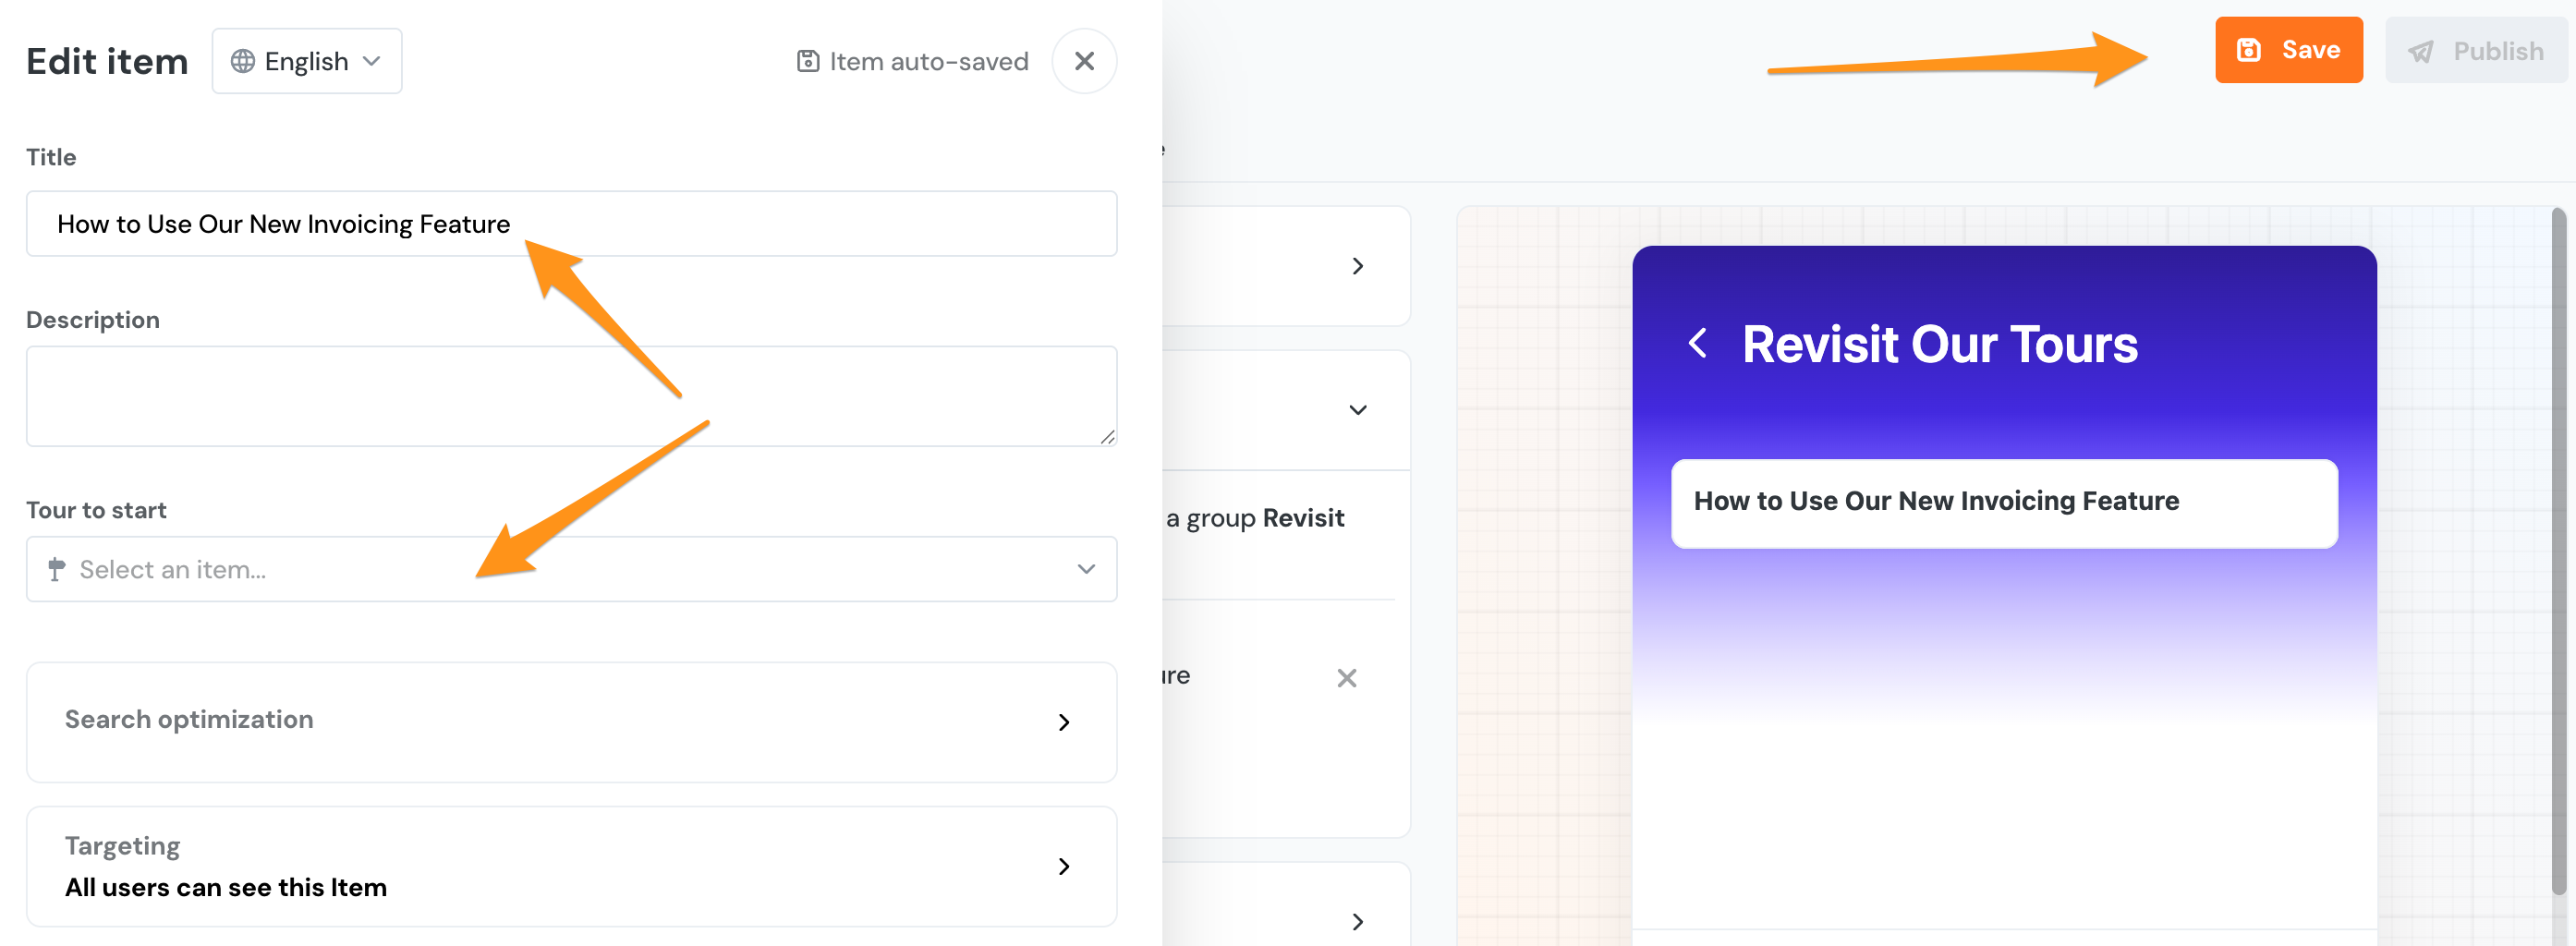
You'll want to give your tour a descriptive name so that users will understand what this tour is about and be able to easily find the correct tour for the information they need.
You can also add any segmentation or URL filtering here, but again Make sure you click save!! You can repeat this process as many times as you need to in order to have a robust group of tours for your users to easily access via the life ring button.

Recap
What are the Best Practices for Tour Creation?
- Make your Tours short and simple
- Make your Tours as interactive and engaging as possible
- Test your tours extensively both in preview and published live before releasing them to your user base
- Use custom buttons for enhanced scenarios
- Use the Life Ring Button to allow users to replay Tours